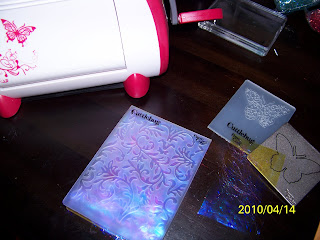
To the left is Film. There are a couple different kinds, however I went with Angelina Film because I found a great site with good prices, and fast shipping. Its to good to go with a variety of colors, because once you pair it with the fibers you can achieve many different looks.
This is the fiber, its not the typical fiber you would think of. This fiber and film are heat bondable. What I mean by this is with heat these materials will become one. My process is to get two pieces of film and place a little bit of fiber between the two sheets.


Once I do that I place those pieces between two sheets of paper. I usually just grab some paper from my printer. I then place a iron with a low setting on top of the sheets of paper for a couple seconds. I then check to see if it is bonded if not then I re-do if for a couple more seconds. I almost always have to trim the fibers that did not stay in between the sheets of film, but that's OK.
 I figured out which Cuttlebug folders I wanted to use and passed through it, with the die cut I did have to use a piece of card stock as a shim. For the A2 size used Angelina film color Crystal Amethyst and Angelina Fiber Red Wing Flash. For the butterfly I used the same film but with Angelina Fiber Desert sunset sparkle. Its hard to show in picture form how these fibers look, however they are very fine and have a sparkle to it.
I took this picture in low light trying to get the best picture I could. It was taken on top of both black and white card stock to show the different out comes just a piece of paper behind it can give it way different out comes. With the black paper you see more of the red and pink, and with the white it shows more of the yellow. You can also see with the butterfly that making these can give a great 3D effect to any project.


 Supplies: Dew Drops (located in the floral section of most stores; baggie, Tim Holtz Alcohol Inks; something to dry them on (they will stain so I use wax paper).
 I put about 10 drops into the baggie. You can put more or less depending on how light or dark you want them.


