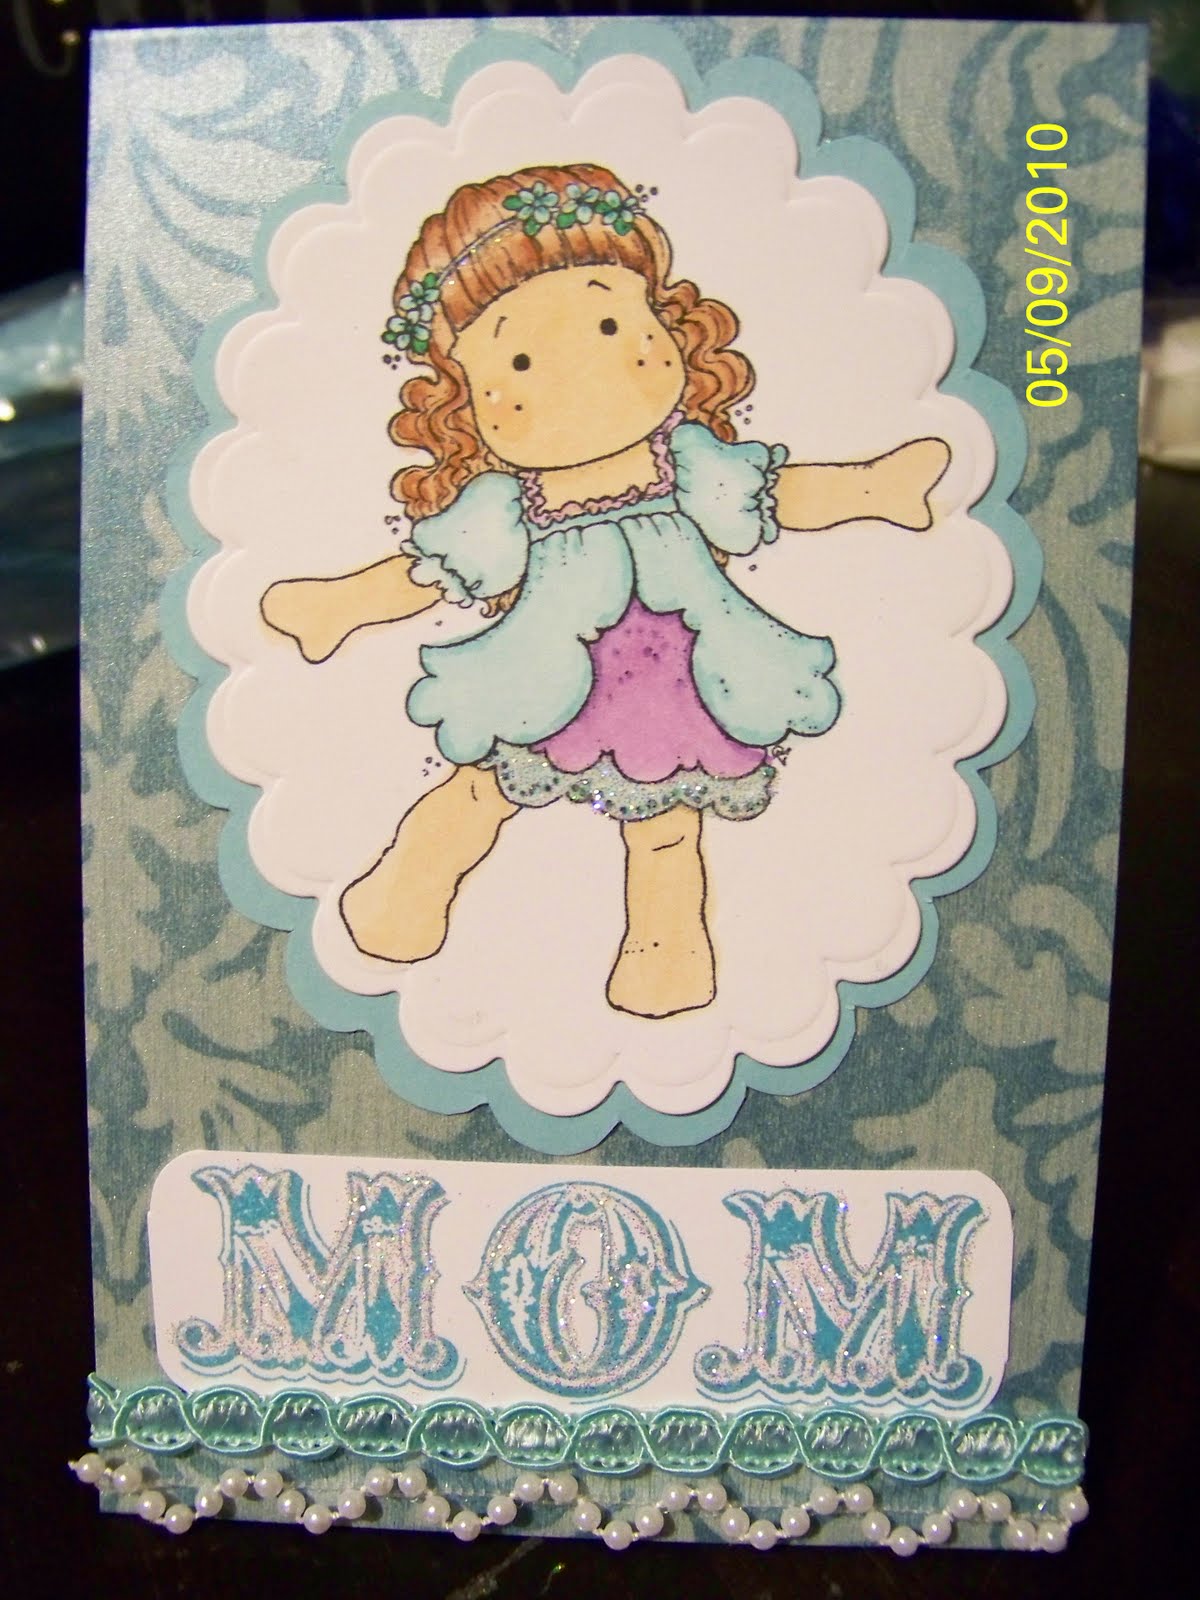
 Whew! Two Tilda's one day! This was my second card I made for Mother's Day. Of course, I colored with Copic markers, which I am seriously addicted to! This Tilda is slightly taller then some of the other Tilda's so my recently bought Nestibilites were to small for this Tilda. So what I did was whip out my Gypsy and made a round scalloped circle into a oval one!!! It worked and boy did it save my life! I stamped the word "Mother" unto a piece of cardstock, and put some Tim Holtz distress ink on the sides to complete my sentiment. I then got some Stampin Up Filigree charms, which I then colored with my Copic's to match colors I had already used. The laced ribbon on the bottom is more of a beige color but my camera makes all my cards look a lot brighter then they really are! That completed my card!
Sunday, May 9, 2010
Tilda
Whew! Two Tilda's one day! This was my second card I made for Mother's Day. Of course, I colored with Copic markers, which I am seriously addicted to! This Tilda is slightly taller then some of the other Tilda's so my recently bought Nestibilites were to small for this Tilda. So what I did was whip out my Gypsy and made a round scalloped circle into a oval one!!! It worked and boy did it save my life! I stamped the word "Mother" unto a piece of cardstock, and put some Tim Holtz distress ink on the sides to complete my sentiment. I then got some Stampin Up Filigree charms, which I then colored with my Copic's to match colors I had already used. The laced ribbon on the bottom is more of a beige color but my camera makes all my cards look a lot brighter then they really are! That completed my card!
Midsummer Nights Tilda
 I just love the Fairytale Collection that Magnolia just released! This is Midsummer Night Tilda. I colored her with Copic Sketch Markers. This was the first time I used the Spellbinders Nestabilities, and I will now need to buy more. They were fairly simple to use and it gives a since of elegance to the image. I found the beaded lace at my LSS and at first I wasn't to happy with it on the card. When I bought it, it was solid white! I just didn't like how all the white was taking away from Tilda's pretty greenish blue dress. So I got the Copic marker that I had used on the dress and colored the lace! I just heard about using Copic's to color other objects just a couple of days ago! I am so happy I did, because it would have been a pain to try to find lace that matched this card. This is the card I will be giving my mom for Mother's day, and I still need to make one for my Mother In-Law. That's what I get for waiting till the last minute.
 Tuesday, May 4, 2010
Card with Mo Manning, and Copic
 I am just loving the Copic Sketch Markers. This is the first none Magnolia image I have colored and I think it cam out great. Not to mention having the right type of paper makes a really big difference. My camera was having a really hard time keeping the image focused once I pressed the shout button, so after many takes this was the best one. I am very disappointed in it since it lost the brightness of the colors and the pink card stock looks really light. Which by the way they are not. I gave up trying as it was 5:30 in the morning and I needed sleep.
 Of course it was my fault for joining a swap in the 12Th hour, when everyone has had months to prepare and send in their cards. But, I think I did a good job after all. Plus, I made 10 of these so yes very time consuming and not as fun as just making one card.
Wednesday, April 14, 2010
Using Film and Fiber with the Cuttlebug

To the left is Film. There are a couple different kinds, however I went with Angelina Film because I found a great site with good prices, and fast shipping. Its to good to go with a variety of colors, because once you pair it with the fibers you can achieve many different looks.

This is the fiber, its not the typical fiber you would think of. This fiber and film are heat bondable. What I mean by this is with heat these materials will become one. My process is to get two pieces of film and place a little bit of fiber between the two sheets.


Once I do that I place those pieces between two sheets of paper. I usually just grab some paper from my printer. I then place a iron with a low setting on top of the sheets of paper for a couple seconds. I then check to see if it is bonded if not then I re-do if for a couple more seconds. I almost always have to trim the fibers that did not stay in between the sheets of film, but that's OK.
 I figured out which Cuttlebug folders I wanted to use and passed through it, with the die cut I did have to use a piece of card stock as a shim. For the A2 size used Angelina film color Crystal Amethyst and Angelina Fiber Red Wing Flash. For the butterfly I used the same film but with Angelina Fiber Desert sunset sparkle. Its hard to show in picture form how these fibers look, however they are very fine and have a sparkle to it.
I took this picture in low light trying to get the best picture I could. It was taken on top of both black and white card stock to show the different out comes just a piece of paper behind it can give it way different out comes. With the black paper you see more of the red and pink, and with the white it shows more of the yellow. You can also see with the butterfly that making these can give a great 3D effect to any project.
Sunday, April 11, 2010
Gypsy Simple Box
I just created a box using only Gypsy Font and Gypsy Wanderings. Well it took many hours to get the welding right and many trial and errors. 

This was a product of a Gypsy File Swap which had to use only the Gypsy Carts and having a spring theme. I used a StampIn Up rolling stamp with Versa Mark and White Embossing power to embellish the box. Once the swap is complete I will then post more details.
Tuesday, April 6, 2010
My Cricut Expressions Dust Cover
 On the Gypsy Message Board the ladies came up with the challenge to use Kerning. I thought long and hard about how to do this, so I went serching for inspiration. I came across a thread about a templete that Custom Crops has on their website to make your own dust covers. I have been wanting one so bad, but I thought $25 was to much (this is the amount I have been seeing all over the place). I could do it myself once I felt motivated enough to actually do it.
With a template it was what I needed to motivate me. I love the colors, Red, White and Black, which matches most of my craft storage and boxes. I have also been waiting for the perfect time to use my Sentimentals Cart. I just love the key!!! So I thought about how can I use the key and make a saying to put on my dust cover, and it just came to me. The key and lock are both fabric which were cut after adhering it to HeatN Bond. The letters were painted on (they are a font from the Storybook Cart). I used my Gypsy to Kern the letters. the first row is at .02, the second is at .04, and the third is at .08. I used the paper as a stencil and then painted with white fabric paint. The dark red, and white dots are actually rhinestones. I never think a project is done until something shine is on it!
Monday, April 5, 2010
Making Your Own Dew Drops.
Ok, I am always trying to save money on my craft supplies. So I came across people using "Skittles,"I thought what in the world are these, and do I need these to? So of course, once I discovered what they were, "I needed them!" Ok maybe WANT would be a better word. Then I did more research into cost. I could not believe the prices I saw, and every one pretty much said they were made using Tom Holtz Alcohol Inks. I have have those, so what else did I need to make my own???? I went to Micheal's and found a bag of acrylic Dew Drops and this is how I made my own!
 Supplies: Dew Drops (located in the floral section of most stores; baggie, Tim Holtz Alcohol Inks; something to dry them on (they will stain so I use wax paper).
 I put about 10 drops into the baggie. You can put more or less depending on how light or dark you want them.


Supplies: Dew Drops (located in the floral section of most stores; baggie, Tim Holtz Alcohol Inks; something to dry them on (they will stain so I use wax paper). Place the amount you want in baggie (I used 100). Select the color or blend of colors you may want.
I put about 10 drops into the baggie. You can put more or less depending on how light or dark you want them.After mixing it all in the bag making sure that all of them are coated you can let them dry on what ever you have selected to dry them on (i.e. wax paper)
These are the end product of me trying to save money. The first picture with all the clear Dew Drops is the amount left after I already made these (600). The container is a container I bought at Target in the Dollar Bin.
I hope you liked my little experiment, and I hope it helps you save money to!
Friday, March 19, 2010
Robotz Card

I started by picking a picture that I could weld together easily. I used the shadow so that I could then layer the front of the card. I had to copy flip and rotate the image to make it a mirror of the first image. So that when I folded it would line up. I added a small rectangle that I then welded to each image so that I could make it a card. The Robotz has card options but not like the one I made...
 This is the image once it was cut, and since I took the picture after I finished the front, this is actually the inside. I am using these as my sons Birthday invite so this is where all that good information will be!
 I then cut all the layers that went with the original Robot in the different colors I chose. Usually when you use the Gypsy you can use small pieces of paper and place them on the mat at the same time and then cut all at one. Since, I am doing them in mass I used the Expression Auto Fill feature.
 I couldn't just let the paper just be sad and boring so I used my Pink Cuttlebug and Cats Eye Chaulk to give it a different look.
 This is what it turned out to be in the end. Oh and the black wheels have pearl ex mister on them to make them shine.
There Crystal I added a new project!
Monday, March 15, 2010
Making your own misters

You will need rubbing alcohol, a spray bottle, Perfect Pearls, or Pearl Ex, and reinker if you like. You can alsouse water instead of the rubbing alcohol. It depends on how fast you want it to dry. The more rubbing alcohol the faster it dries. You do not need a lot of which ever powder you choose. I use less then half of my pinkie finger tip.

This picture shows Perfect Pearls Forever Violet the top has more sprays and the bottom has one spray. The picture doesn't not show how sparkly it is. The right picture is the same, however I put Tim Holtz Alcohol Ink Slate. Again the top has more sprays then the bottom. You can see the difference in that the paper on the left stayed white, and the right has more color. I could make it darker or light by adding less or more ink.

This picture is showing Pearl Ex True Blue (left), and Pearl Ex Flamingo Pink on the right. Again, the top has one spray and the bottom has more.
Using different powders and inks will give it different effects as well as how much alcohol and water you use. Also the color of paper you use also effects the end out come.
Circles

So there was a challenge given by another message board member in the gypsy forum, and all you had to do was use circles. I used the Gypsy to cut out circles on pink cardstock. The trick to get a different look was to put circle within circles. Now when I took the cardstock of the mat all I had were plain circles. I then used the scraps left from cutting the circles within circles and placed them in a way that I liked. I then used the circle embossing folder and put the scraps through the Cuttlebug. To give it more color I used red Cats Eye chaulk. I just rubbed on them to give the effect I wanted. You can always rub less or more on not at all. I then put a pink bow and my stamped image of Tilda. I colored her with Copic Sketch markers.
Wednesday, February 24, 2010
Card
 This is supper easy to recreate. I used a Stampin Up heart punch and Sweet Treats cups for the candy. I made a sliding door pull tab to get the candy out, without destroying the card. The design was made with a heart stamp and sentiment stamped with Versa Mark and embossed with clear and red embossing powder.
Gypsy basket

I made this using Love Struck and Accent Essentials. It was fairly simple. I chose the cut and then welded two tabs on each side of the heart, again adjusting to my dimensions. I made a mirror image and pressed cut. The paper was just plain red card stock, so I use a simple stamp with Versa Mark to give it a watermark. Before it completely dried I dusted it with glitter.
simple card

This is a very simple card. I used my gypsy to get the dimensions I wanted and pressed cut. I believe I used Storybook for the frame. I then used a sentiment stamp, cut it out and used pop dots for dimension. The sentiment can always be changed to anything you desire.
Gypsy box
 These were cut with my Gypsy, and I say cut not created because I did not create these cuts. I got the Gypsy file from www.cricutinspiration.blogspot.com/ . She is a fellow message boarder, and I just love her creations! If you interested in knowing more about these boxes please visit her bolg, it's a great one.
I got this idea from Custom Crops. They used thin metal sheets inside their Cuttlebug, so I had to try it. Instead of using a Cuttlebug folder I tried it with a Spellbinders Embossibility. I had to use a couple of extra pieces of card stock in order for it to work, but it did! I then sanded down the raised embossed areas and this is what I got. I put it in a photo frame so that I can add some contrast in picture gallery that I'm working on. I ordered both the metal sheets and Spellbinder from Custom Crops.
Pillows

These pillows were a product of my first attempt with fabric in the Cricut. I used the Home Decor cart, white fabric, black fabric and clear rhinestones, and of course heat and bond. It was fairly simple to do.
stampin up card

I made this card using Stampin up products at a Stampin up demo with my demostrater Pam. She is a really sweet and talented lady.
Apron

I had to have a crafting apron, right? So I made altered one! The apron I bought at the LSS and it came with the band of white ribbon with black dots, and bow already on it. I cut the cupcake, cherry and my nickname (Mrs. Lisa) with my Cricut. I just used heat and bond and pressed cut. I love when everything sparkles or has some kind of bling on it! So I use heat set rhinestones. For the cupcake I used black, and clear rhinestones for sprinkles, and then I embellished the pock a dot band with clear rhinestones.
valentines card

This is a bag I made for my baby girl. She is into all kinds of bags and purses so I made her one, well kinda. The bag I bought at my LSS, along with the Dora iron on. The letters are made with my Cricut and I added the clear rhinstones for a little bit of sparkle.
Tuesday, February 16, 2010
My very first post.
I will soon be adding pictures of some of the projects that I have made. Some are from my own creativity and some will be inspired by others.
Subscribe to:
Posts (Atom)

